Please note this doesn’t catch all ransomware, a good backup plan is the best way, but it is a free way of potentially catching something.
Installing FSRM
Open Server Manager, click Manage and go to Add Roles and Features
Press Next until you get to the Server Roles selection screen.
Open File and Storage Services, then File and iSCSI Servers and finally select File Server Resource Manager
Press Next until you finish install wizard.
Setting up File Screen
Once installed, in Server Manager, go to Tools then open File Server Resource Manager.
Open up File Screening Management, and select File Screens
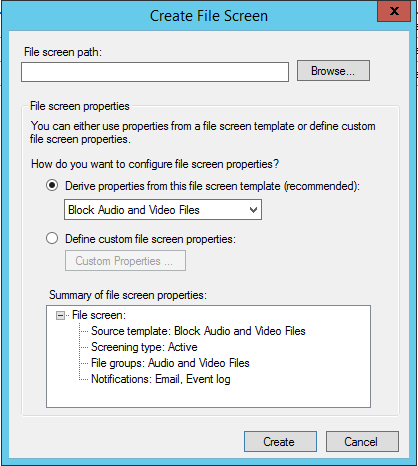
We will start be creating a File Screen for one share, with a test file that we can create a template out of. Press Create File Screen
Browse to the location you want to watch for ransomware.

Select Define custom file screen properties and press Custom Properties.
In the Settings page, under Maintain file groups press Create
For File group name, use Known Ransomwware Files. Under Files to include use testfile.txt, press OK. In the Select file groups to block tick it to enable it.
In Email Message, I ticked Send e-mail to the following administrators and put the sys admins email in.
In Event Log I also ticked Send warning to event log. This is so I could potentially use this info to grab how many have happened in a certain time in the future.
In Command, tick Run this command or script and paste the below
C:\Windows\System32\WindowsPowerShell\v1.0\powershell.exe
Under Command arguments: paste
-ExecutionPolicy Unrestricted -NoLogo -Command "& { Get-SmbShare -Special $false | ForEach-Object { Block-SmbShareAccess -Name $_.Name -AccountName '[Source Io Owner]' -Force } }"
Under Run the command as: select Local System
Press Ok, and Press ok when asks to save as template.
To set your smtp server to send the email, select the File Server Resource Manager, and select Configure Options. Under Email Notifications, add your SMTP server add your smtp settings. I’m using a postfix server to relay to Office 365 so will put the IP of that in their.
Test this works as expected by trying to save a file called testfile.txt from a remote pc using the share name you selected. You should get You need admin permissions to save pop up box, and then you should receive an email. Check the user can’t save, edit, access any other file on that server remotely.
To unblock the user, use the below, changing samaccountname for the username you want to block
Get-SmbShare -Special $false | ForEach-Object { Unblock-SmbShareAccess -Name $_.Name -AccountName ‘samaccountname’ -Force }
Now we need to fill the Known Ransomware Files group with actual ransomware extensions and files. Create a folder on the C drive of the server, called Scripts. Open notepad as admin and paste the below and save as C:\Scripts\fsrm.ps1
Add-Type -AssemblyName System.Web.Extensions
$serializer = New-Object System.Web.Script.Serialization.JavaScriptSerializer

$url = "https://fsrm.experiant.ca/api/v1/get"
$fsrmGroup = "Known Ransomware Files"
$ransomwareExts = "C:\Scripts\fsrm.txt"
$ransomwareOld = "C:\Scripts\fsrm.old"
copy-item $ransomwareExts $ransomwareOld -force

[Net.ServicePointManager]::SecurityProtocol = [Net.SecurityProtocolType]::Tls12
$extList = Invoke-WebRequest $url -UseBasicParsing
$extList.content | out-file $ransomwareExts -force

$dif = compare-object -referenceobject $(get-content $ransomwareExts) -differenceobject $(get-content $ransomwareOld)

if (!$dif) {
write-host "No new changes, nothing to do"
exit
}

$extListExpanded = $extlist.content
$readableList = $serializer.DeserializeObject($extListExpanded) | % { $_.filters }

Get-FsrmFileGroup $fsrmGroup | Set-FsrmFileGroup -IncludePattern $readableList
Open Powershell as admin, and run c:\scripts\fsrm.ps1. This should create fsrm.txt in the scripts folder and fill the group. Check the group by selecting your file screen, and Edit File Screen Properties. Under Maintain file groups press Edit. You should now see the big list in here.
Create scheduled task
Create a scheduled task for this to run a few times a day to get the latest file types added to the group.
Open up Task Scheduler, then select Create Task. Give the task a name, and select Run whether user is logged on or not and select a service account that will have permissions to run this.
Go to Triggers, and press New. I selected Daily, Start 12:00:00, Recur Every: 1 days, Repeat task every: 12 hours. Press Ok
Actions tab, press New, under Program/Script type powershell.exe under Add Arguments c:\scripts\fsrm.ps1.
Save the task and enter the service account password when prompted.
Test task.